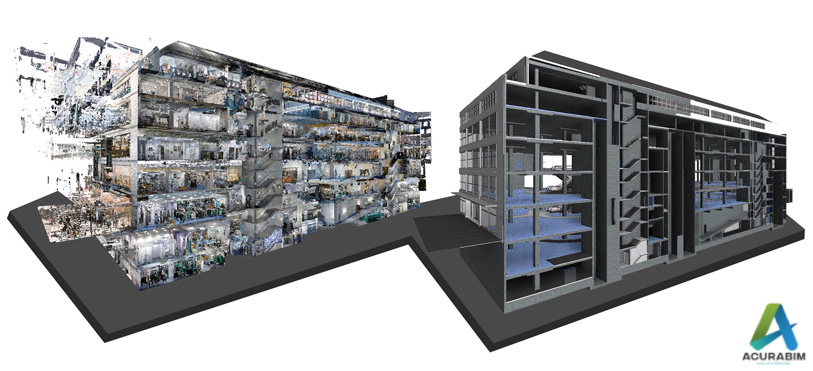
Scan To BIM in Revit
Scan To BIM in Revit:
Scan to BIM (Building Information Modelling) is a process of creating a digital 3D model of a physical building or structure using point cloud data obtained from laser scanners or other digital imaging technologies. This process allows architects, engineers, and construction professionals to create accurate, detailed, and up-to-date models of existing structures, which can be used for various purposes such as renovation, retrofitting, and facility management.
Here are some pointers on how to perform Scan to BIM in Revit:
Obtain point cloud data: The first step in the Scan to BIM process is to obtain accurate point cloud data of the physical building or structure. This can be done using laser scanners, photogrammetry, or other digital imaging technologies.
- Clean and organize the point cloud data: Once you have the point cloud data, it is important to clean and organize it to ensure that it is ready for use in Revit. This may involve removing excess data, aligning the point cloud with a known coordinate system, and organizing the data into logical groups or layers.
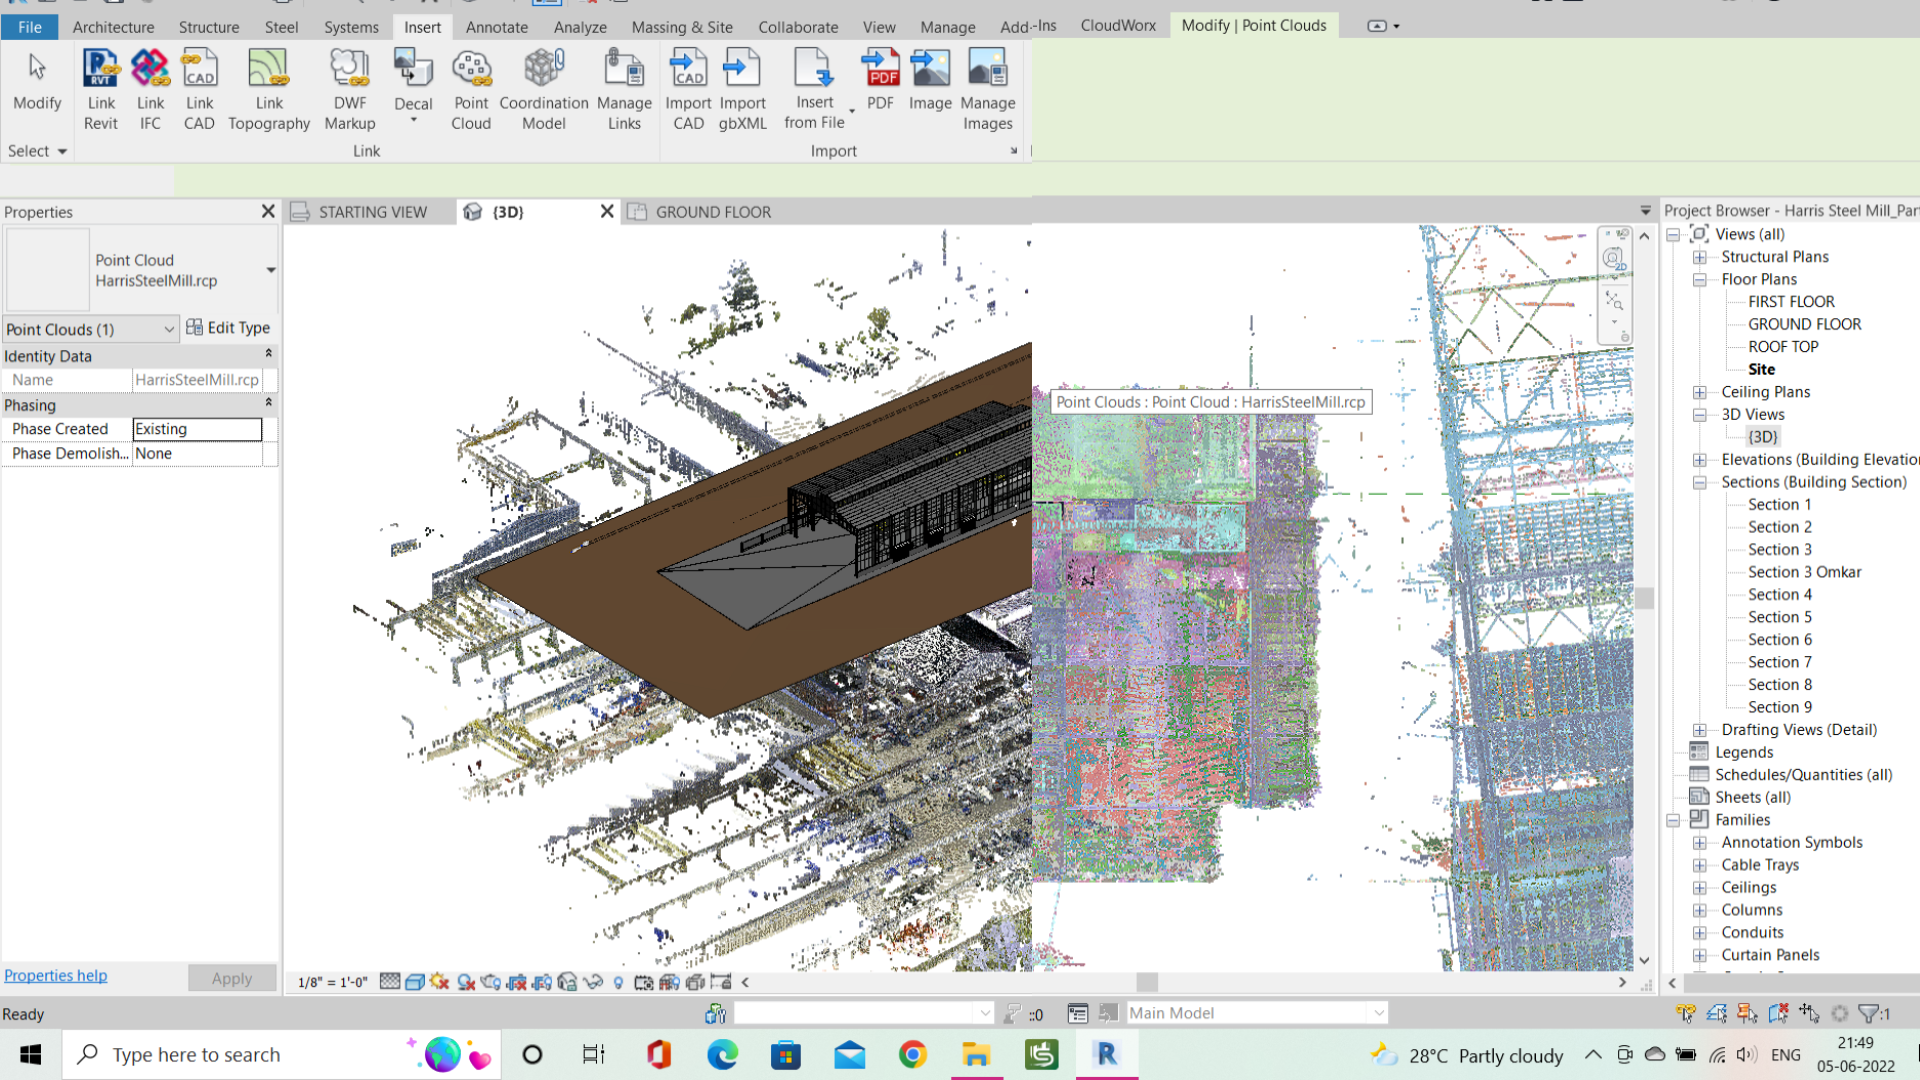
- Import the point cloud data into Revit: Once the point cloud data is organized, it can be imported into Revit using the “Import Point Cloud” tool. This tool allows you to select the point cloud file and specify the coordinate system, scaling, and other relevant parameters.
- Create a 3D model from the point cloud data: Once the point cloud data is imported into Revit, you can use it to create a 3D model of the physical building or structure. This can be done by selecting points or groups of points from the point cloud and creating 3D elements such as walls, floors, roofs, and so on.
- Add annotations and details to the model: As you create the 3D model, you can also add annotations and details such as dimensions, notes, and materials to provide more information about the building or structure.
- Use the 3D model for various purposes: Once the 3D model is complete, it can be used for various purposes such as renovation, retrofitting, facility management, and more. You can also use the model to generate 2D construction documents, create visualizations and animations, and perform structural and MEP analysis.
- In summary, Scan to BIM in Revit involves obtaining point cloud data of a physical building or structure, importing the data into Revit, creating a 3D model from the data, adding annotations and details to the model, and using the model for various purposes. By following these steps, you can create accurate and detailed digital models of existing structures, which can be used for a wide range of purposes in the architecture, engineering, and construction industries.
Application of Scan to BIM:
- As-built documentation: Scan to BIM can be used to create an accurate, digital representation of an existing building, which can be used for as-built documentation and record-keeping purposes.
- Renovations and retrofits: Scan to BIM can be used to create a detailed model of an existing building, which can be used to plan and execute renovations or retrofits.
- Facility management: A BIM model created using Scan to BIM can be used to manage and maintain a building over time, including tasks such as tracking equipment, scheduling maintenance, and identifying potential issues.
- Energy analysis: A BIM model created using Scan to BIM can be used to analyse a building’s energy performance and identify opportunities for energy efficiency improvements.
- Coordination: A BIM model created using Scan to BIM can be used to coordinate the design and construction of a project, ensuring that all stakeholders have access to the same accurate, up-to-date information about the project.
