revit

Creating Filters In Revit

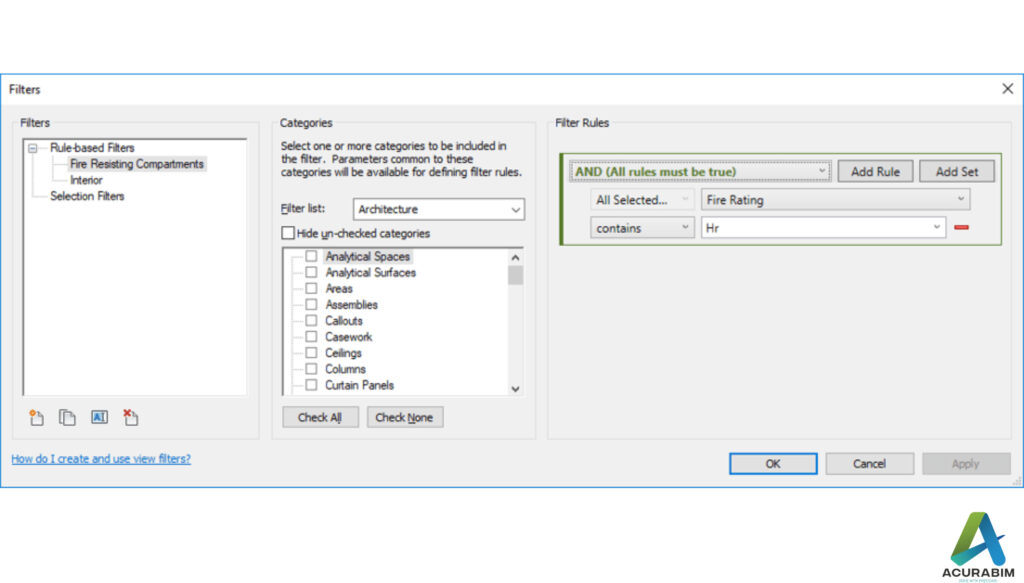
Creating Filters In Revit Filters in Revit are a powerful tool that allow users to quickly and easily locate specific elements within a project. They can be used to isolate specific types of elements, such as walls or doors, or to find elements with specific characteristics, such as those with a particular material or those located on a particular level. In this blog post, we’ll walk through the steps for creating a filter in Revit. Here are the steps you can follow to create Filters in Revit: Open the project in Revit and navigate to the “Manage” tab. Select the “Filters” option from the “Settings” panel. Click the “New” button to create a new filter. Choose the type of filter you want to create. Revit allows users to create two types of filters: element filters and view filters. Element filters allow users to select specific types of elements within a project and manipulate them as a group, while view filters allow users to control the visibility of elements within a particular view. Specify the criteria for the filter. Depending on the type of filter you are creating, you may need to specify the element type, material, or other characteristics that the filter should include. Assign a name to the filter. This will help you easily identify the filter in the future. Click “OK” to save the filter. Once you’ve created a filter, you can apply it to a view by selecting the filter from the “Filters” dropdown menu in the “Visibility/Graphic Overrides” panel of the “View” tab. This will cause the selected elements to be highlighted in the view, making them easier to locate and manipulate. Filters can also be used in combination with other tools, such as the “Isolate” command, which allows users to temporarily hide all elements except those that are included in the filter. This can be helpful for focusing on specific elements or for troubleshooting issues within a project. Summary: In summary, creating a filter in Revit is a simple process that allows users to quickly locate and manipulate specific elements within a project. By following these steps, you can easily create and apply filters to help streamline your work in Revit.

Creating Filters In Revit Read More »

Export Sketchup file to Google Earth

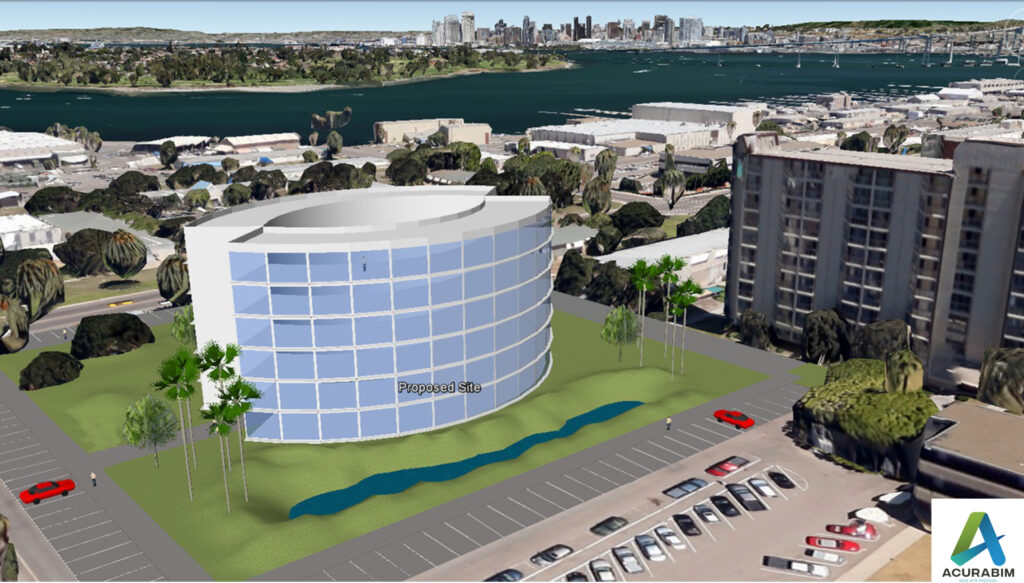
Introduction: SketchUp is a powerful 3D modelling software that is widely used by architects, designers, and other professionals in the construction and design industry. One of the great features of SketchUp is the ability to export your model to Google Earth, allowing you to view your design in a real-world context. Exporting a SketchUp file to Google Earth is a simple process that can be done in just a few steps. Make sure that you have both SketchUp and Google Earth installed on your computer. Sketchup file is converted to KML file, & thus that file Is imported in Google Earth. A brief explanation for KML file is given in following para. About KML File: A KML file is a type of file that is used to store geographic data and information in a format that can be easily read by a variety of mapping and spatial analysis software. KML stands for “Keyhole Markup Language,” and it is a file format that was developed by Google for use with its Google Earth software. One of the key features of KML files is that they allow you to store and display geographic data in a way that is easily understood by both humans and computers. KML files use a system of tags and attributes to describe the data that they contain, and this makes it easy for software programs to interpret and display the data in a meaningful way. There are many different types of data that can be stored in a KML file, including points, lines, and polygons that represent features on the earth’s surface, as well as information about the appearance and behaviour of these features. For example, you can use a KML file to store information about the location and appearance of a building, or you can use it to store data about a network of roads or a set of geographic boundaries. KML files are often used in a variety of applications, including GIS software, mapping websites, and mobile apps. They are also commonly used to share geographic data with others, as KML files can be easily shared and viewed by anyone who has access to a KML-compatible application. Overall, KML files are an important tool for storing and sharing geographic data, and they are widely used in a variety of fields, including geography, mapping, and spatial analysis. Whether you are working on a professional project or simply exploring the world around you, KML files can be a valuable resource for understanding and visualizing the earth’s surface. To export your SketchUp file to Google Earth, follow these steps: Open your SketchUp model in SketchUp. Go to the “File” menu and select “Export.” In the export dialog box, select “Google Earth (KML)” as the file type. Choose a location to save the KML file, and click “Export.” Open Google Earth and go to the “File” menu. Select “Open,” and choose the KML file that you just exported from SketchUp. Your SketchUp model will now be displayed in Google Earth, allowing you to view it in the context of the real world. You can use the navigation tools in Google Earth to pan, zoom, and rotate your model, and you can also use the layers panel to turn different elements of your model on and off. Summary: Exporting a SketchUp model to Google Earth is a great way to share your design with clients and colleagues, and it can also be a helpful tool for visualizing your design in a real-world context. Whether you are working on a residential project, a commercial building, or any other type of design, exporting your SketchUp model to Google Earth can be a valuable part of your workflow.

Export Sketchup file to Google Earth Read More »

Why Choose Revit?

As everyone is aware that BIM is a technique, the appropriate software must be used to put it into practice. Revit software is the best BIM-compatible software available, and it is the one that is most widely utilized by significant AEC businesses. It is one of the few pieces of software that was developed with the models and designs produced by BIM technology in mind. Users of the Revit programme have access to data that includes every design and module that is visible to everyone working on the project. In this article, we’ll go over the significance of the Revit programmed and why architects choose to work with it in particular to complete BIM modelling projects. The designers have been able to develop the design according to their vision thanks to Revit’s ample flexibility and distinctive characteristics. Typically, complicated and large-scale projects employ the Revit programme. To differentiate itself from other software, it provides technical instructions and a unique design process that enable architects to build designs that meet the project’s criteria. For instance, a fabrication display, CNC-controlled machines, and a drafting studio. We will now talk about some of the benefits that the Revit software offers to architects and how it shows that it is an excellent tool. The following are some of the top benefits and features of Revit software: Project visualization in 3D Using vector graphic families in the Revit software, architects may swiftly plan the project’s layout while seeing the entire project. This enables the architects to consider all of the project’s components and their life cycles before selecting the appropriate items. As the architects continue to build the project, this will provide a visual explanation of the entire undertaking. As a result, it is simple to design items in this software with virtual reality in mind because Revit enables architects to construct the exact same objects that they first imagined. Ability to adapt to change   The Architects can make adjustments whenever it suits them thanks to Revit software. For instance, numerous architectural elements like doors, seats, windows, floors, and rearranging the divider may all be altered and changed in size. When compared to other BIM Software’s, it is more time-efficient and convenient for an architect or engineer to make changes. Therefore, one may create duplicate components, keep the original design, and update it without exerting any effort. Excellent Teamwork To inform them of what has been constructed and its impact on other teams’ designs, Revit Software allows all of its users to share their database with additional teams. Knowing that engineers and architects have different backgrounds makes it vital for them to grasp one another’s work in order to fully comprehend the project. By providing all the capabilities that can be accessible by all the architects and engineers throughout the firm, Revit makes it feasible. Additionally, it maintains a record of the things that are ordered at every level. This function is special since it informs the other teams about the orders placed at the other corporate departments. Many views Unlike other software, Revit enables the creation of a single model for any prototype. This enables viewers to see the model from a variety of perspectives, including elevations, floor plans, and a three-dimensional representation of every other component. Making several copies throughout various phases of the design process is not necessary. Any modifications made to the original file are reflected in every single view. Accurate Designs Applications or software for 2D drawings may frequently overwrite a component’s dimensions, which can lead to design problems at the very end of the process. However, because Revit is a 3D programme, the documentation is more exact and precise. The 3D model won’t let you replace the numbers since doing so would prevent it from being guided in the right direction. It has grown in popularity as a result of the accuracy it offers customers, making it easier for them to make final selections based on the designs. Virtual Work When compared to other software, Revit is the kind that enables users to build models using less designs. Therefore, if you create less, there will be fewer printouts of the drawings. As a result, adopting Revit software helps save a good amount of paper. It continuously collects and gathers all the information needed by the model. By assigning them distinctive tags, one may alter the information. So, you can keep track of the project’s development without depending on paper. Many AEC firms have eliminated paper from their operations, and the remaining ones are moving toward doing the same. Minimal Repetition As was said in the paragraph above, the Revit programme automatically retrieves the necessary data for the project. In other applications, you are need to repeatedly alter the designs you produced for one specific component in order to make them work in other components as well. It takes longer and is more difficult to complete as a result. If the same modifications are not applied or the component is completely overlooked, it might also result in issues in other components. While everyone has access to all sorts of designs and components through the programme Revit, where data is consolidated. As a result, the repetitious effort is removed, making it simple to finish the job on time or early.
Why Choose Revit? Read More »

Scroll to Top
×

Hello!

Click one of our contacts below to chat on WhatsApp

× How can I help you?