BIM

Creating Construction Documents with Revit A Step-by-Step Guide

Introduction: Creating construction documents with Revit can seem like a daunting task, but with a little guidance, it’s actually quite simple. Here’s a step-by-step guide to creating construction documents with Revit: Steps For Creating Construction Documents Are As Follow: Top of Form By following these steps, you should be able to create professional-grade construction documents using Revit. With a little practice, you’ll be able to quickly and efficiently create construction documents for any project.

Creating Construction Documents with Revit A Step-by-Step Guide Read More »

Shortcuts in Revit

Shortcuts in Revit in 2025

Shortcuts in Revit in 2025 Shortcuts in Revit in 2025 As professionals in architecture, engineering, or construction, we all understand the importance of efficiency. Revit, one of the leading BIM (Building Information Modeling) software solutions, offers numerous keyboard shortcuts that can greatly enhance productivity. In 2025, mastering these shortcuts is essential to staying competitive and efficient in the fast-paced world of building design and project management. Let’s explore some of the most important Revit shortcuts, how to customize them, and how they can make your workflows faster and smoother. Why Revit Shortcuts Matter in 2025 Revit has evolved over the years, and 2025 is no different. With ongoing advancements in BIM technology, the complexity of projects has increased, requiring professionals to adopt smarter ways of working. Keyboard shortcuts offer a quick, seamless way to interact with the software, reducing reliance on menus and enhancing overall efficiency. As project timelines tighten and expectations for accuracy grow, these shortcuts can make a significant difference in day-to-day operations. Understanding and using the right shortcuts can save time, minimize errors, and make complex tasks feel much more manageable. Essential Revit Shortcuts for Increased Productivity Revit provides a wide array of shortcuts designed to streamline tasks. These shortcuts can be categorized into several key areas, each aimed at boosting productivity. Navigation Shortcuts These shortcuts can be particularly helpful when you’re managing multiple views, sheets, or 3D models at once. In 2025, as project files grow larger and more complex, these navigation shortcuts become invaluable. Object Manipulation Shortcuts These manipulation shortcuts make editing elements within your model faster and easier. As the complexity of designs increases, having these commands at your fingertips will save you hours of work. How to Customize Shortcuts in Revit While Revit offers a comprehensive list of pre-set shortcuts, customizing them allows you to tailor the workflow to your specific needs. Here’s how you can do it in 2025: By customizing shortcuts, you can prioritize your most-used commands and reduce the friction in your workflow. This personalization can be a game changer when working on tight deadlines or large-scale projects. Maximizing Efficiency with Revit Shortcuts To truly take advantage of these shortcuts, it’s important to practice them regularly. The more you use them, the more second nature they become, allowing you to work with Revit almost instinctively. Additionally, creating cheat sheets or sticky notes with shortcuts for tasks you frequently perform can serve as helpful reminders. Efficiency doesn’t just come from knowing the shortcuts but also from integrating them into your daily workflow. Shortcuts like F2 for the “Modify” tool or F5 for accessing the “Properties” palette will quickly become essential tools you rely on every day. Conclusion Keyboard shortcuts in Revit are more than just a time-saver—they are key to boosting productivity and managing projects efficiently. In 2025, with growing project demands and increasingly complex designs, mastering these shortcuts can help you get the most out of Revit and significantly streamline your processes. By learning, customizing, and integrating these shortcuts into your daily workflow, you can stay ahead of the curve and ensure a smooth, productive experience in Revit. Make 2025 the year you optimize your Revit workflow!AcuraBIM AcuraBIM

Shortcuts in Revit in 2025 Read More »

AutoCAD to Building Information Model(Revit)

Introduction: For decades, architects, engineers, and construction professionals have used Computer-Aided Design (CAD) software to create 2D drawings of building projects. However, with the rise of Building Information Modelling (BIM), many organizations are now transitioning from traditional CAD workflows to 3D modelling and collaboration. In this blog, we will explore the benefits of BIM and discuss how to make the transition from CAD to BIM as smooth as possible. Here are the steps you can follow to convert your Computer-Aided Design (CAD) data to Building Information Modelling (BIM) format: 1. Choose a BIM software: The first step in converting from CAD to BIM is to choose a BIM software that meets your needs and the needs of your organization. Some popular options include Revit, ArchiCAD, and Vector works. 2. Invest in training: It’s important to invest in training to ensure that you and your team are proficient in using the BIM software you have chosen. This can be done through online courses, workshops, or in-house training programs. 3. Clean up your CAD data: Before you begin the conversion process, it’s a good idea to clean up your CAD data to ensure that it is accurate and up-to-date. This may involve checking for errors, correcting any issues, and making sure that all relevant data is included. 4. Use conversion software: There are a number of conversion tools available that can help you import your CAD data into a BIM model. These tools can often handle a wide range of file formats, including AutoCAD, MicroStation, and others. 5. Check and verify the converted data: Once your CAD data has been converted to BIM format, it’s important to check and verify that the data has been correctly converted. This may involve comparing the converted data to the original CAD data, as well as reviewing the BIM model for accuracy and completeness. 6. Review and optimize the BIM model: Once your BIM model is complete, you should review it to ensure that it is optimized for your needs. This may involve reviewing the model for efficiency, identifying areas for improvement, and making any necessary changes. 7. Train your team: If you have a team of people working on your BIM projects, it’s important to ensure that they are trained in the use of the BIM software and the specific workflow you have established for your organization. This may involve providing additional training or creating detailed documentation and guidelines for your team. By following these steps, you can successfully convert your CAD data to BIM format and begin using BIM to design and document your building projects.

AutoCAD to Building Information Model(Revit) Read More »

Collaborating in Revit

Introduction: Building Information Modelling (BIM) has revolutionized the way that architects, engineers, and construction professionals design and document building projects. One of the key tools used in BIM is Revit, which allows teams to create 3D models of buildings and their components and collaborate in real-time. However, collaborating with Revit requires careful planning and effective communication to ensure that everyone is working towards a common goal. In this blog, we will explore best practices for collaborating with Revit and discuss strategies for managing changes and resolving conflicts. 1. Setting up a Revit collaboration workflow: Before you start working with Revit, it’s important to establish a clear workflow for collaboration. This should include: • Defining roles and responsibilities: Each team member should have a clear understanding of their role and responsibilities within the project. For example, one team member may be responsible for creating the initial Revit model, while another may be responsible for updating the model as changes are made. • Establishing a central file server: All Revit files should be stored on a central file server that can be accessed by all team members. This will help to ensure that everyone is working with the most up-to-date version of the model. • Creating a shared project calendar: A shared project calendar can help team members to coordinate their work and stay on track. This can be as simple as an Excel spreadsheet or a more sophisticated project management tool like Asana or Trello. 2. Managing changes and resolving conflicts: As the Revit model evolves, it’s likely that changes will be made by different team members at different times. It’s important to have a system in place for managing these changes and resolving conflicts that may arise. Here are a few tips: • Use Revit’s version control features: Revit includes a range of version control features that allow you to track and manage changes to the model. For example, you can use the “Compare” tool to see the differences between two versions of the model, or use the “Worksets” feature to allow multiple team members to work on different parts of the model simultaneously. • Communicate clearly and regularly: good communication is key to successful collaboration. Make sure to have regular check-ins with your team and be clear about any changes or updates you make to the model. • Use conflict resolution tools: If conflicts do arise, there are a number of tools that can help you resolve them. For example, you can use the “Audit” tool in Revit to identify and fix any errors in the model, or use the “Revision Cloud” feature to highlight areas of the model that need attention. Conclusion: Collaborating with Revit can be a challenging but rewarding experience. By setting up a clear workflow and using the tools and features available in Revit, you can ensure that your team is working efficiently and effectively towards a common goal. With careful planning and good communication, you can successfully navigate the complexities of BIM and deliver high-quality building projects.

Collaborating in Revit Read More »

Scan To BIM in Revit

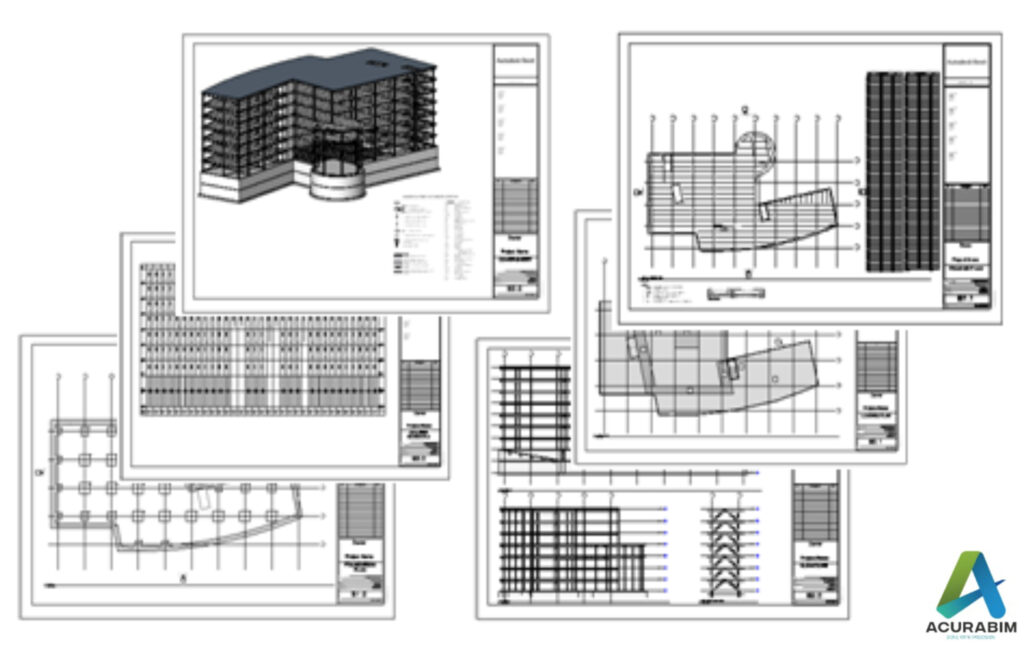
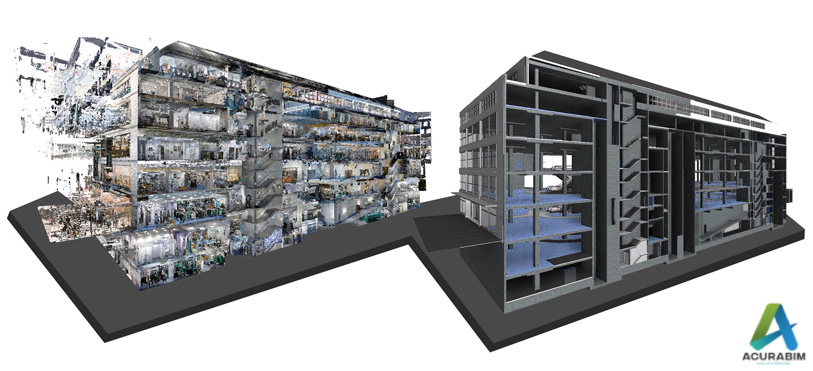
Scan To BIM in Revit: Scan to BIM (Building Information Modelling) is a process of creating a digital 3D model of a physical building or structure using point cloud data obtained from laser scanners or other digital imaging technologies. This process allows architects, engineers, and construction professionals to create accurate, detailed, and up-to-date models of existing structures, which can be used for various purposes such as renovation, retrofitting, and facility management. Here are some pointers on how to perform Scan to BIM in Revit:  Obtain point cloud data: The first step in the Scan to BIM process is to obtain accurate point cloud data of the physical building or structure. This can be done using laser scanners, photogrammetry, or other digital imaging technologies. Clean and organize the point cloud data: Once you have the point cloud data, it is important to clean and organize it to ensure that it is ready for use in Revit. This may involve removing excess data, aligning the point cloud with a known coordinate system, and organizing the data into logical groups or layers. Import the point cloud data into Revit: Once the point cloud data is organized, it can be imported into Revit using the “Import Point Cloud” tool. This tool allows you to select the point cloud file and specify the coordinate system, scaling, and other relevant parameters. Create a 3D model from the point cloud data: Once the point cloud data is imported into Revit, you can use it to create a 3D model of the physical building or structure. This can be done by selecting points or groups of points from the point cloud and creating 3D elements such as walls, floors, roofs, and so on. Add annotations and details to the model: As you create the 3D model, you can also add annotations and details such as dimensions, notes, and materials to provide more information about the building or structure. Use the 3D model for various purposes: Once the 3D model is complete, it can be used for various purposes such as renovation, retrofitting, facility management, and more. You can also use the model to generate 2D construction documents, create visualizations and animations, and perform structural and MEP analysis. In summary, Scan to BIM in Revit involves obtaining point cloud data of a physical building or structure, importing the data into Revit, creating a 3D model from the data, adding annotations and details to the model, and using the model for various purposes. By following these steps, you can create accurate and detailed digital models of existing structures, which can be used for a wide range of purposes in the architecture, engineering, and construction industries. Application of Scan to BIM: As-built documentation: Scan to BIM can be used to create an accurate, digital representation of an existing building, which can be used for as-built documentation and record-keeping purposes. Renovations and retrofits: Scan to BIM can be used to create a detailed model of an existing building, which can be used to plan and execute renovations or retrofits. Facility management: A BIM model created using Scan to BIM can be used to manage and maintain a building over time, including tasks such as tracking equipment, scheduling maintenance, and identifying potential issues. Energy analysis: A BIM model created using Scan to BIM can be used to analyse a building’s energy performance and identify opportunities for energy efficiency improvements. Coordination: A BIM model created using Scan to BIM can be used to coordinate the design and construction of a project, ensuring that all stakeholders have access to the same accurate, up-to-date information about the project.

Scan To BIM in Revit Read More »

Scroll to Top