Author name: Acura

Augmented Reality in Construction Industry

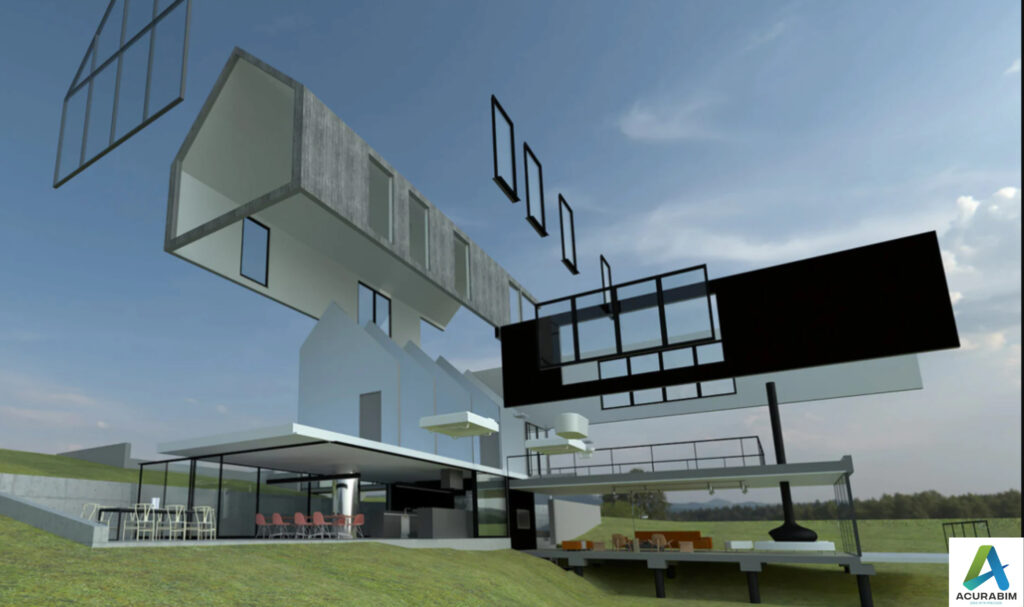
What is Augmented Reality: The utilisation of information in the form of text, pictures, music, and other virtual upgrades that are combined with physical items is known as augmented reality (AR). This “real world” component is what sets augmented reality apart from virtual reality. Applications for Augmented Reality in construction: Despite being one of the largest and oldest sectors in the world, construction struggles frequently to adopt new tools. Nevertheless, innovation is a vital resource for the building sector. Another innovative development in the construction sector is augmented reality, which is a priceless tool for all facets of this sector. It makes use of cutting-edge camera and sensor technologies that blend digital components, audio, and sensory input. They all support the real-time presentation of the data. The usage of augmented reality in the construction industry is appropriate in the following application areas: Visualizing project data in real time: The incorporation of documents and digital information is Augmented Reality’s main benefit in the building industry. It makes it possible for everyone to routinely check the progress of the construction project, including workers, architects, engineers, and clients. Making measurements during construction and evaluating project effectiveness are further options. Promoting teamwork: Effective cooperation is particularly crucial in the construction industry, which relies heavily on collaboration. The best possible use of each team member is made possible with the aid of augmented reality. Problem solving and error correction can be adopted early on by continuously focusing on the desired result. The physical presence of every team member is no longer required. How augmented reality can be applied to the building industry The construction sector is slowly beginning to adopt mobile applications. Since a while ago, augmented reality wearables and construction have become increasingly popular. Through the usage of open development kits, building can be enhanced and improved at any time. Any phase of building can benefit from augmented reality: Prior to the start of construction, during the design phase. While the project is being built, AR also makes it simpler to monitor whether everything is proceeding according to plan. This makes it simple to steer clear of errors. Upon completion of the project, to confirm that all requirements have been met. AR’s advantages for the construction sector The use of augmented reality in the construction sector has many advantages. Although the expenses of this cutting-edge technology are still substantial, they are gradually declining. As a result, it is expected that small and medium-sized businesses will soon be able to invest in this method of operation. These businesses will specifically gain from the most significant benefits of augmented reality in construction during the process. Rework and downtime-related losses are reduced Project completion on schedule is particularly crucial in the construction sector to guarantee that budgets are met. BMI models have been useful, but using augmented reality in building makes this task much simpler. Construction schedules can be modified, and the logistics of the upcoming weeks can be prepared as needed, thanks to the use of both technologies. Furthermore, it’s simpler for employees to identify any overlaps. By doing so, it is unnecessary to redo any work, and virtual reality in construction encourages worker safety Enhanced project management and collaboration. Construction companies may present the outcomes even before the work is finished thanks to augmented reality. Misunderstandings are more readily discernible. Because AR Overlays assist in identifying problems more quickly, paper schedules and communication delays are also removed. Additionally, this makes it simpler to carry out inspections as needed. The collaboration between the various parties can be optimised by using apps like Assist AR or xMake. Of course, Frontline communications are no different: they all make sure that teams collaborate more effectively and accurately. The drawbacks of virtual reality in building Construction projects can be accompanied with AR for the duration of their existence. In turn, this lower building costs since accuracy rises and rework can be avoided. These benefits of augmented reality in construction unequivocally support the application of the cutting-edge technology. The available options do, however, have some restrictions. Augmented reality use in the building industry is modest. This is particularly true given that AR is still regarded as a developing technology that hasn’t undergone enough testing. The high degree of effectiveness, correctness, and consistency is debatable. But for applications in engineering and construction, these points are crucial. Complex 3D information models are currently only partially covered. The newness of this technology presents another obstacle. Many businesses are hesitant to invest in this technology since the financial ramifications are not yet fully understood. There is a learning curve that needs to be climbed before using augmented reality in building. A reliable WLAN and Internet connection must be made during the construction of an augmented reality building. The reliability of the devices is not guaranteed in a volatile environment. A look at the use of AR in construction in the future A cutting-edge technology that is expected to advance the construction sector is augmented reality. Thanks to the numerous advantages of an Augmented Reality introduction, processes can be optimised and made more efficient. As a result, future construction projects can be realised faster and safer. In fact, augmented reality engineering applications could have a huge impact on the construction sector. After all, this technology provides many opportunities for people to maximise their potential and continues to advance.

Augmented Reality in Construction Industry Read More »

Visualizing and communicating design concepts with Revit

Introduction: Design visualization is an essential aspect of the design process, as it helps designers and clients to understand and communicate the concepts and ideas behind a project. One tool that can be used to effectively visualize and communicate design concepts is Revit, a building information modelling (BIM) software developed by Autodesk. Revit is widely used in the architecture, engineering, and construction industries, and is particularly useful for creating detailed 3D models of buildings and structures. In addition to being a powerful modelling tool, Revit also has a range of features that make it well-suited for visualizing and communicating design concepts. Here are some tips for using Revit to visualize and communicate design concepts: Use 3D models to create realistic representations of your design. Revit allows you to create detailed 3D models of your design, complete with accurate dimensions, materials, and lighting. This can be a great way to give clients and stakeholders a better understanding of how your design will look and feel in the real world. Create visualizations that focus on specific aspects of your design. Revit has a range of visualization tools, including 3D walkthroughs, perspective views, and section views, that allow you to focus on specific aspects of your design. For example, you might create a 3D walkthrough of your design to show how people will move through the space, or use perspective views to highlight key features and details. Use annotations and callouts to explain your design. Revit allows you to add text and graphics to your model to explain and clarify your design. You can use annotations to add notes, labels, and dimensions to your model, and use callouts to highlight specific features or areas of interest. Use materials and lighting to add realism to your visualizations. Revit allows you to assign materials to different elements of your model, such as walls, floors, and ceilings. You can also add lighting to your model to create more realistic visualizations that show how your design will look in different lighting conditions. Use Revit’s rendering tools to create high-quality images and videos. Revit has a range of rendering tools that allow you to create detailed, photorealistic images and videos of your design. This can be a great way to showcase your design to clients and stakeholders, and can help to bring your concepts to life.

Visualizing and communicating design concepts with Revit Read More »

The benefits of using the IFC file format in construction projects

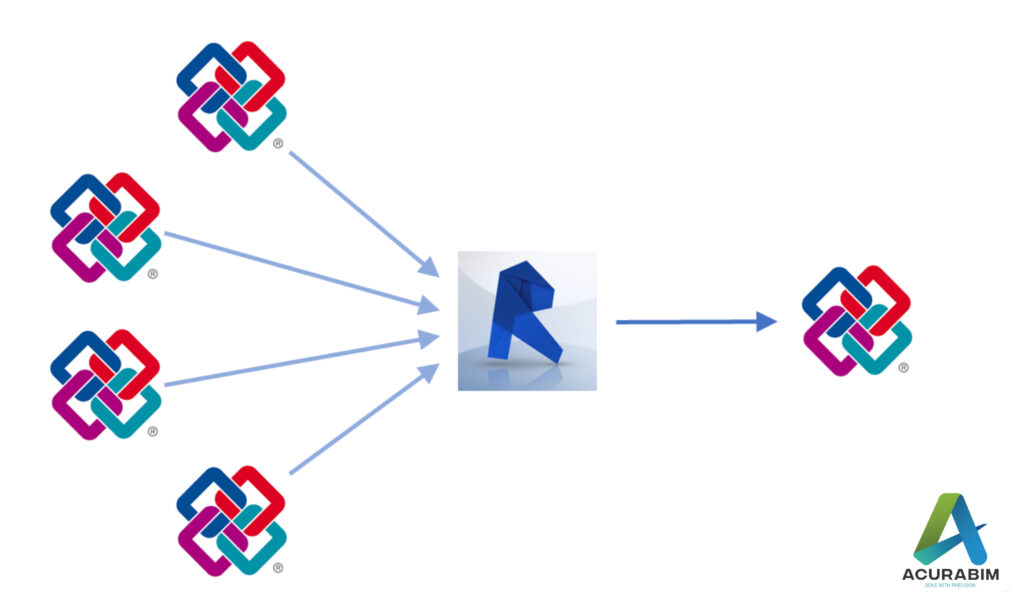
Introduction: The IFC (Industry Foundation Classes) file format is a standardized data model for building and construction information. It was developed by the International Alliance for Interoperability (IAI) and is widely used in the AEC (Architecture, Engineering, and Construction) industry. In this blog, we will explore the benefits of using the IFC file format in construction projects. Advantages of using IFC file format: Improved data exchange and interoperability One of the main benefits of using the IFC file format is that it allows for the exchange of information between different software applications and stakeholders. This means that all parties involved in a construction project can access and use the same data, regardless of the software they are using. This is particularly useful when working with large and complex projects, as it helps to ensure that everyone has access to the latest information and that there are no discrepancies or misunderstandings. Enhanced collaboration and coordination The IFC file format enable improved collaboration and coordination between different teams and stakeholders. It allows for the creation of a single source of truth for the project, which can be accessed and updated by all parties. This helps to ensure that everyone is working from the same set of data and reduces the risk of mistakes or misunderstandings. Improved project management Using the IFC file format can also help to improve project management. It allows for the tracking of changes and updates to the project, as well as the ability to identify potential problems and issues early on. This can help to reduce the risk of delays or budget overruns and improve the overall efficiency of the project. Enhanced sustainability and energy efficiency The IFC file format includes information on the materials, energy consumption, and environmental impact of a building. This information can be used to design and construct more sustainable and energy-efficient buildings. Additionally, the IFC file format can be used to track the performance of a building over time, allowing for ongoing improvements to be made. Conclusion: In summary, the IFC file format has a number of benefits in construction projects. It enables improved data exchange and interoperability, enhanced collaboration and coordination, improved project management, and enhanced sustainability and energy efficiency. As such, it is an important tool for the AEC industry and is likely to continue to be widely used in the future.

The benefits of using the IFC file format in construction projects Read More »

Creating Filters In Revit

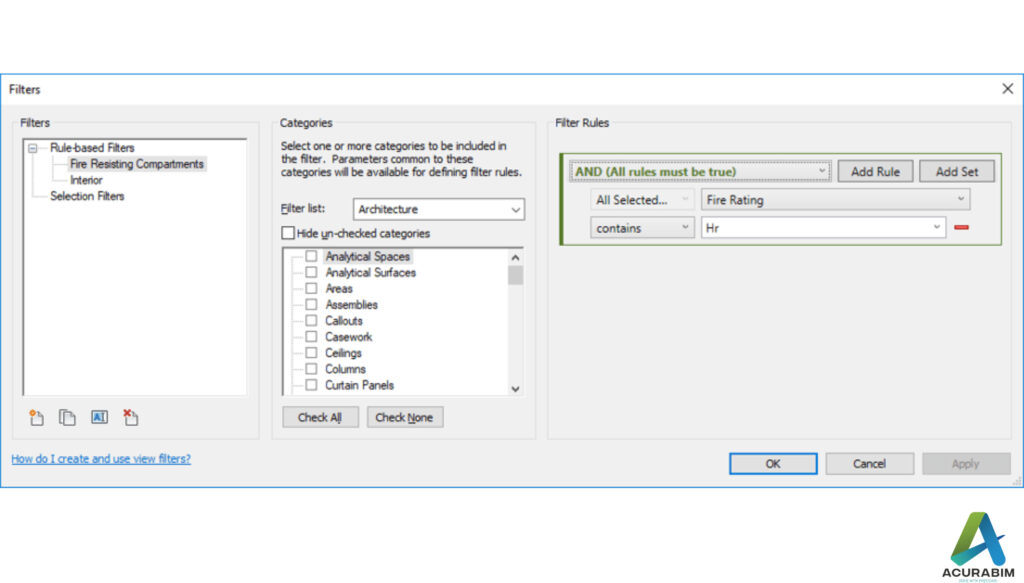
Creating Filters In Revit Filters in Revit are a powerful tool that allow users to quickly and easily locate specific elements within a project. They can be used to isolate specific types of elements, such as walls or doors, or to find elements with specific characteristics, such as those with a particular material or those located on a particular level. In this blog post, we’ll walk through the steps for creating a filter in Revit. Here are the steps you can follow to create Filters in Revit: Open the project in Revit and navigate to the “Manage” tab. Select the “Filters” option from the “Settings” panel. Click the “New” button to create a new filter. Choose the type of filter you want to create. Revit allows users to create two types of filters: element filters and view filters. Element filters allow users to select specific types of elements within a project and manipulate them as a group, while view filters allow users to control the visibility of elements within a particular view. Specify the criteria for the filter. Depending on the type of filter you are creating, you may need to specify the element type, material, or other characteristics that the filter should include. Assign a name to the filter. This will help you easily identify the filter in the future. Click “OK” to save the filter. Once you’ve created a filter, you can apply it to a view by selecting the filter from the “Filters” dropdown menu in the “Visibility/Graphic Overrides” panel of the “View” tab. This will cause the selected elements to be highlighted in the view, making them easier to locate and manipulate. Filters can also be used in combination with other tools, such as the “Isolate” command, which allows users to temporarily hide all elements except those that are included in the filter. This can be helpful for focusing on specific elements or for troubleshooting issues within a project. Summary: In summary, creating a filter in Revit is a simple process that allows users to quickly locate and manipulate specific elements within a project. By following these steps, you can easily create and apply filters to help streamline your work in Revit.

Creating Filters In Revit Read More »

Export Sketchup file to Google Earth

Introduction: SketchUp is a powerful 3D modelling software that is widely used by architects, designers, and other professionals in the construction and design industry. One of the great features of SketchUp is the ability to export your model to Google Earth, allowing you to view your design in a real-world context. Exporting a SketchUp file to Google Earth is a simple process that can be done in just a few steps. Make sure that you have both SketchUp and Google Earth installed on your computer. Sketchup file is converted to KML file, & thus that file Is imported in Google Earth. A brief explanation for KML file is given in following para. About KML File: A KML file is a type of file that is used to store geographic data and information in a format that can be easily read by a variety of mapping and spatial analysis software. KML stands for “Keyhole Markup Language,” and it is a file format that was developed by Google for use with its Google Earth software. One of the key features of KML files is that they allow you to store and display geographic data in a way that is easily understood by both humans and computers. KML files use a system of tags and attributes to describe the data that they contain, and this makes it easy for software programs to interpret and display the data in a meaningful way. There are many different types of data that can be stored in a KML file, including points, lines, and polygons that represent features on the earth’s surface, as well as information about the appearance and behaviour of these features. For example, you can use a KML file to store information about the location and appearance of a building, or you can use it to store data about a network of roads or a set of geographic boundaries. KML files are often used in a variety of applications, including GIS software, mapping websites, and mobile apps. They are also commonly used to share geographic data with others, as KML files can be easily shared and viewed by anyone who has access to a KML-compatible application. Overall, KML files are an important tool for storing and sharing geographic data, and they are widely used in a variety of fields, including geography, mapping, and spatial analysis. Whether you are working on a professional project or simply exploring the world around you, KML files can be a valuable resource for understanding and visualizing the earth’s surface. To export your SketchUp file to Google Earth, follow these steps: Open your SketchUp model in SketchUp. Go to the “File” menu and select “Export.” In the export dialog box, select “Google Earth (KML)” as the file type. Choose a location to save the KML file, and click “Export.” Open Google Earth and go to the “File” menu. Select “Open,” and choose the KML file that you just exported from SketchUp. Your SketchUp model will now be displayed in Google Earth, allowing you to view it in the context of the real world. You can use the navigation tools in Google Earth to pan, zoom, and rotate your model, and you can also use the layers panel to turn different elements of your model on and off. Summary: Exporting a SketchUp model to Google Earth is a great way to share your design with clients and colleagues, and it can also be a helpful tool for visualizing your design in a real-world context. Whether you are working on a residential project, a commercial building, or any other type of design, exporting your SketchUp model to Google Earth can be a valuable part of your workflow.

Export Sketchup file to Google Earth Read More »

Scroll to Top